Thursday, April 14, 2016

Snack Series: Chocolate Granola Parfait


Presenting for your visual enjoyment: the Snack Series! These posts will be less along the lines of full-fledged recipes and more along the lines of flavor combinations I’ve been enjoying, links to other people’s recipes, and potentially disjointed rambling about life. If that doesn’t whet your appetite, then maybe this will!


This picture is my endorsement of any and all breakfasts that include yogurt, fruit butter (or jam or preserves), fresh fruit, and homemade granola. I especially recommend using:
  •         Homemade Blueberry Butter, as found in this book
  •         Chocolate Coconut Granola, as found on this beauty of a site
  •         Liberal amounts of the aforementioned ingredients
April is now almost half over, and I have learned two important things this month. The first is that nature is just as keen on April Fool’s pranks as some people are.  On April 1, after a week of relatively balmy spring weather, I walked out to find ice on my windshield. This is the view from the inside: rather pretty, but still unwelcome.


 The second thing I learned is that if you’re going to pan-fry tofu, don’t do it in an iron skillet unless that skillet is really well seasoned (or in other words, non-stick). You know, unless you want your dinner to end up looking like crumbled dry wall. If you do, well, now you know how to achieve it.

Monday, April 4, 2016

Garlicky Cashew Chicken


After a long dearth of poultry-related posts on this site, I have now given you two chicken recipes in a row. Forgive my poorly synchronized variety, but I couldn’t contain my enthusiasm any longer. I first tried this recipe back in December, and it has been haunting me since.

I love the unique flavor profile of this dish: it has a sweet, salty, spicy, umami combination of flavors with ingredients that smack of both East Asian and South American cuisines. I can never decide whether I would rather have this with rice or as an exotic taco filling, and I end up eating the whole batch before I reach a conclusion.

The good stuff that goes in the food processor
The original recipe calls for thighs or drumsticks and suggests either grilling or broiling. For one reason or another, the thought of dark meat with the cashew coating didn’t appeal to me, so I used chicken tenders the first time, and I have never looked back. As I do not own a grill, broiling was the only way to go, and I am more than satisfied with that decision as well. The chicken tenders cook super fast in the broiler, and they get perfectly done in the time it takes the topping to brown. The final result is a crispy, browned coating on juicy, tender chicken. And given that this recipe is also quick and easy to prepare, I give it my wholehearted endorsement in every regard.  Go eat this now!

Fun Fact: Cashews are a good source of magnesium, a mineral that is essential to the function of more than 300 enzymes in the body. Magnesium is also involved in bone formation, muscle and nerve function, and blood pressure regulation.


Garlicky Cashew Chicken

Adapted from Melissa Clark’s In the Kitchen with a Good Appetite

1 cup roasted cashews, salted or unsalted, with additional cashews for garnish
2 tablespoons chopped cilantro, plus more for garnish
¼ cup olive oil
4 large cloves garlic, peeled and roughly chopped
2 tablespoons soy sauce
2 teaspoons brown sugar*
2 limes – 1 for juice, 1 cut into wedges for garnish
1 or 2 jalapeños, using as many or as few seeds as desired
2 tablespoons water
Salt and pepper to taste
1½ lbs. chicken tenders

Combine the cashews, 2 tablespoons cilantro, olive oil, garlic, soy sauce, brown sugar, lime juice, jalapeño, and water in a food processor or mini food processor (I’m confident a blender would work here too, though it may require more pausing to scrape down the sides), and grind together until smooth. Add salt to taste.

Preheat the broiler. Line a baking sheet with foil, and spray or coat lightly with oil. Season the chicken tenders with salt and pepper, and arrange bottom-side-up on the oiled baking sheet. Drop a generous spoonful of the cashew sauce over each tender, and use a separate utensil to spread over the surface of the chicken (DO NOT TOUCH THE SAUCE SPOON TO THE CHICKEN – IF YOU HAVE EXTRA SAUCE, YOU WANT IT TO BE SANITARY FOR CONSUMPTION).


Broil chicken for 5 minutes, then flip each tender and repeat the sauce spreading process on the smooth top sides. Broil for about 5 more minutes, or until the coating is golden brown, and the chicken’s internal temperature is 165 degrees F.

Sprinkle additional chopped cashews and chopped cilantro over the top, and serve with lime wedges and extra sauce, if any.

This chicken is delicious on its own and would also make a great lettuce wrap filling. Leftover sauce would be delicious on rice or as a sandwich spread (I’m thinking a BLT…mmmm….)


*I accidentally misread this as 2 tablespoons the last time I made this. It was still delicious, and it made the sauce brown up nicely. It certainly doesn’t need this much sugar, though.

Monday, February 29, 2016

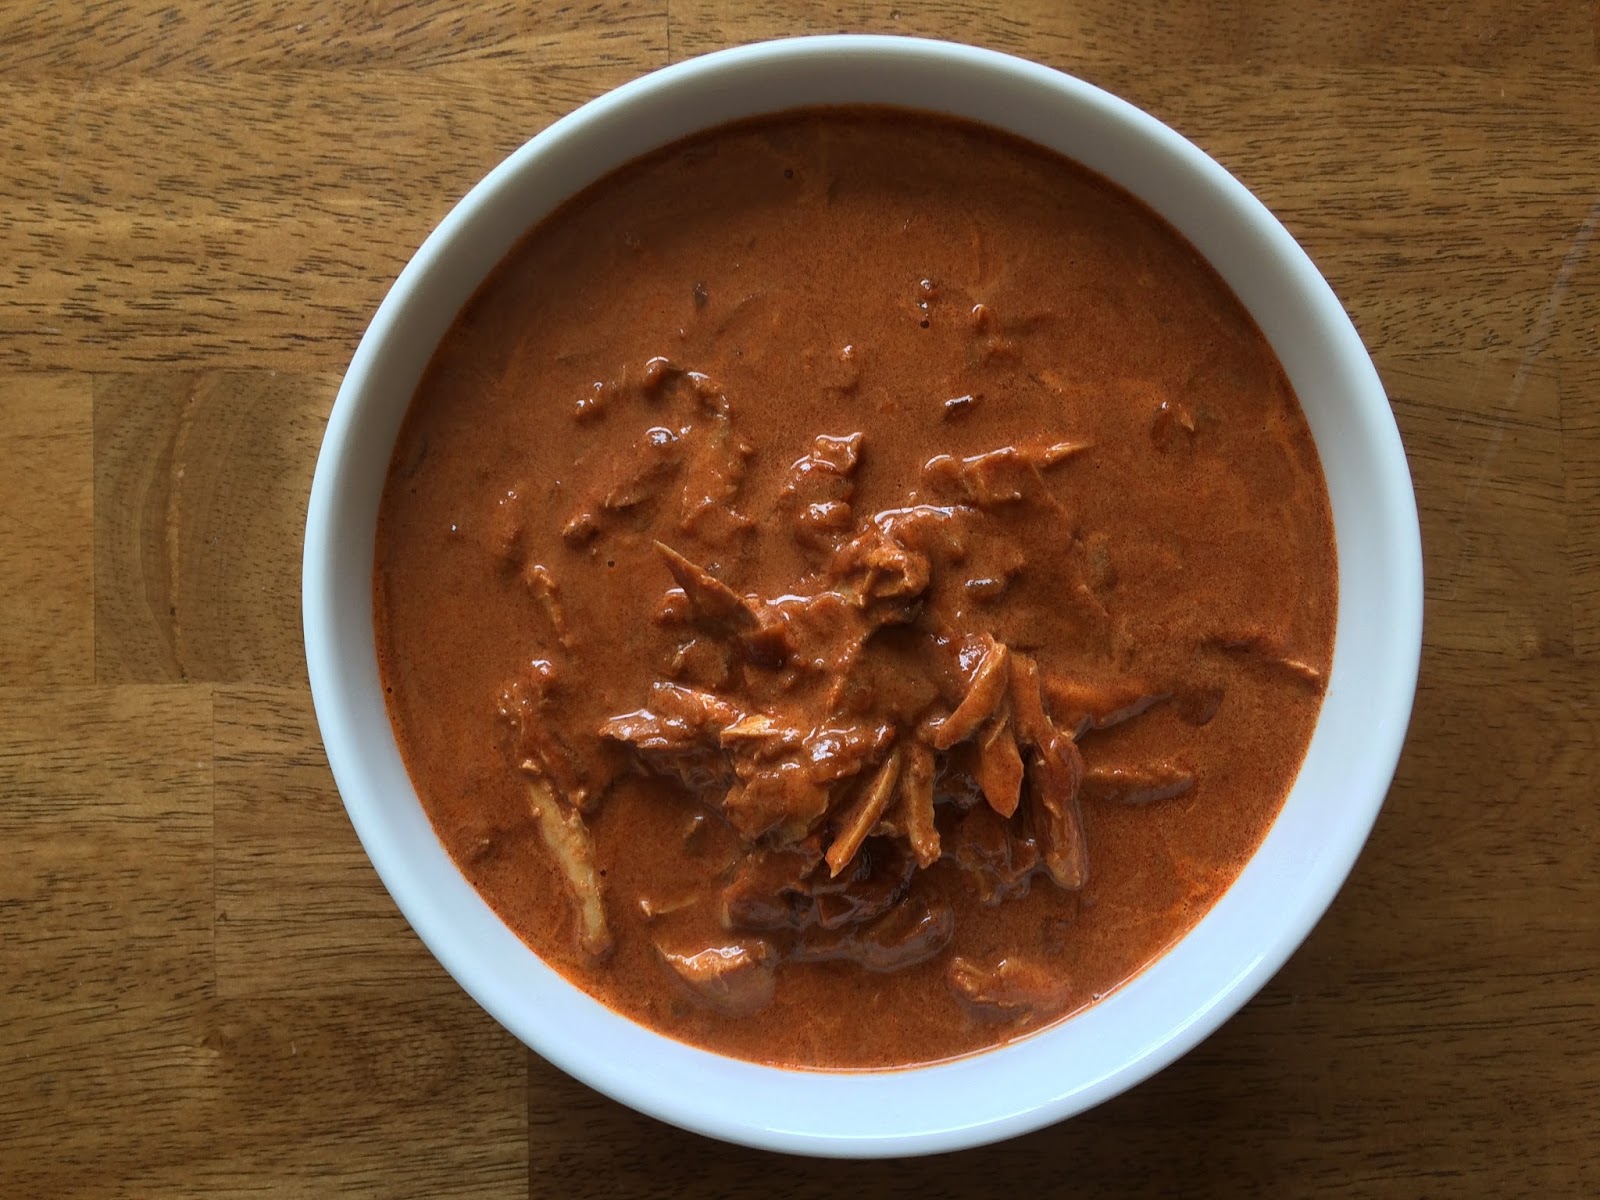
Chicken Paprikash


I’m still not sure how to pronounce it, but I sure know how to eat it! This dish comprises everything I love in a good chicken recipe: delicious, easy, interesting, and not soaked in a half gallon of oil. (I know that last attribute is really setting the bar high.)


I’ve had this recipe bookmarked for close to half a year and finally got around to trying it last week. I then proceeded to make it again…and again…all in the same week. In my defense, I shared a lot of the goods, but the fact that I made this recipe 3 times in 7 days underscores how good it is.

I can summarize the recipe thusly: sauté onion, add paprika, add chicken and water, simmer for 1 hour, shred chicken, add sour cream and flour, season with salt and pepper. It’s really that easy, yet the flavor is rich and complex. The paprika, onion, chicken, and sour cream combine into a savory, creamy, warmly spiced (but not spicy) sauce; and the chicken is super tender from the long braise. It goes perfectly over a bowl of rice with a good book and a fuzzy blanket.


A couple notes on ingredients:
Chicken – the original recipe calls for bone-in thighs or chicken breasts, quartered. I have only tried this recipe with dark meat, as all my local grocers seem to be anti-bone-in chicken breasts. I imagine you could also try boneless, though. I have tried both thighs and drumsticks, and both tasted great. However, it was a pain in the derriere to get the skin off the drumsticks, and the sauce ended up way fattier than when I used thighs.
Paprika – you don’t need to use the fancy stuff, but it should be fresh. The original recipe asserts the more paprika the better. I agree and would add that you don’t want to be using old, pale, sad paprika. Feel free to buy the cheap-o brand, though. As long as it’s fresh, the end result will be really good.

Fun Fact: The dark parts of poultry are dark due to more myoglobin, which is an iron-containing protein in muscle. Ergo, the dark meat contains more iron than the light meat. This is a boon for iron-deficient, budget-conscious shoppers such as myself. If you want to maximize your iron absorption, eat it separately from calcium-rich foods because calcium and iron compete with each other.


Chicken Paprikash
From Food52.com

2 tablespoons vegetable oil
1 large onion, diced
4 heaping tablespoons paprika
4 bone-in chicken thighs, with skin and excess fat trimmed away (or 2 chicken breasts or 5 drumsticks)
1¼ teaspoons salt
½ cup sour cream
1 spoonful (approximately 1 tablespoon) all-purpose flour
Salt and pepper to taste

Heat the oil in a medium-large pot over medium heat, and sauté the onions until soft. Add the paprika, and continue to sauté, stirring very frequently, for a couple of minutes. Add the chicken to the pot, and sprinkle salt over. Stir everything together until the chicken is coated in the paprika.

Here is where I diverge from the recipe slightly: the original states to let the chicken brown slightly, but I forgot to do this the first time, and it still turned out great. Due to laziness, the most I have done is get the chicken slightly de-pinked. So, do what you want. Follow your instincts. Browning probably concentrates and enriches the flavors a bit.

Add 2 cups water, and bring to a boil. Turn down the heat, and simmer partially covered – I like to prop the lid with a wooden spoon – for 45-60 minutes until the chicken is cooked through (165 degrees Fahrenheit). Remove the chicken to shred it, and discard the bones. Whisk the sour cream and flour together, and stir into the paprikash broth. If the sauce is thinner than you want it, then boil it down to the desired consistency while the chicken is removed. Add the chicken back to the pot, and heat through. Serve over rice or with dumplings. Or both!

Friday, February 12, 2016

Mexican Black Beans


Every time I eat beans, I ask myself why I don’t eat them more often. For such a humble and inexpensive food, they’re surprisingly delicious, healthy, and substantial. They come in enough varieties and are used in enough world cuisines that I could eat them for a long time and not get bored. So if you, like me, are resolving to eat more beans this year, here is a great preparation to add to your repertoire.

These Mexican black beans are fantastic over Mexican rice, plain rice, on their own, or as a side. They’re nice and toasty from all the cumin and fresh from the cilantro and lime. You can keep this dish really easy and fast by using canned beans or you can make it cheap and folate-rich by using dried beans. These aren’t too shabby topped with shredded cheese either.

A note about using dried beans: don’t do what I did and try to be all “efficient” by using up the last bit of an old bag of beans along with some newer beans. Just don’t. Half of them will be all mushy while the others stubbornly refuse to soften. Stupid beans.

Some of the beans turned PURPLE after soaking!

 Fun Fact: Black beans are high in folate, containing about 32% the Recommended Daily Allowance in ½ cup boiled. (High-heat cooking destroys folate, so canned beans have less folate than boiled dried beans.) Folate is important for DNA synthesis, cell division, and the formation of hemoglobin.


Mexican Black Beans
Adapted precious little from epicurious.com

1 cup dried black beans (or 2 15-oz. cans)
1 Tablespoon olive oil
4 garlic cloves, minced
1 jalapeño chili, seeded and diced fine
heaping ½ teaspoon ground cumin (toasted and ground at home is preferable)
14.5 oz. can low-sodium chicken broth (or water + chicken soup base)
Juice of ½ lime, plus more to taste
3 Tablespoons chopped cilantro, plus more to taste
Salt and pepper to taste


If using dried beans, sort, rinse, and soak overnight with 2 inches (or about 3 cups) of water covering the beans. After soaking, drain the beans, and cover with fresh water by about 2 inches. Boil for 1½ - 2 hours, until very tender.* Alternatively: cook beans in a slow cooker on high for 3-4 hours. Alternatively to the alternative: cook beans WITHOUT pre-soaking in a slow cooker for 3-5+ hours (I find the soak helps the texture, though).

*The cooking time will vary depending on the age of the beans, your elevation, the hardness of the water, etc.


With your cooked/canned beans ready, you can prepare the dish. Heat olive oil in a large-ish nonstick frying pan over med-high heat. Add minced garlic, jalapeño, and ground cumin, and sauté for about 30 seconds. Add cooked beans and chicken broth, and cook together for about 5 minutes, stirring occasionally. With a masher, crush as many beans as desired to get a chunky or smooth consistency. Continue to boil until the mixture has thickened as much as desired. Add lime juice, cilantro, salt, and pepper to taste.

Friday, January 1, 2016

On Resolutions

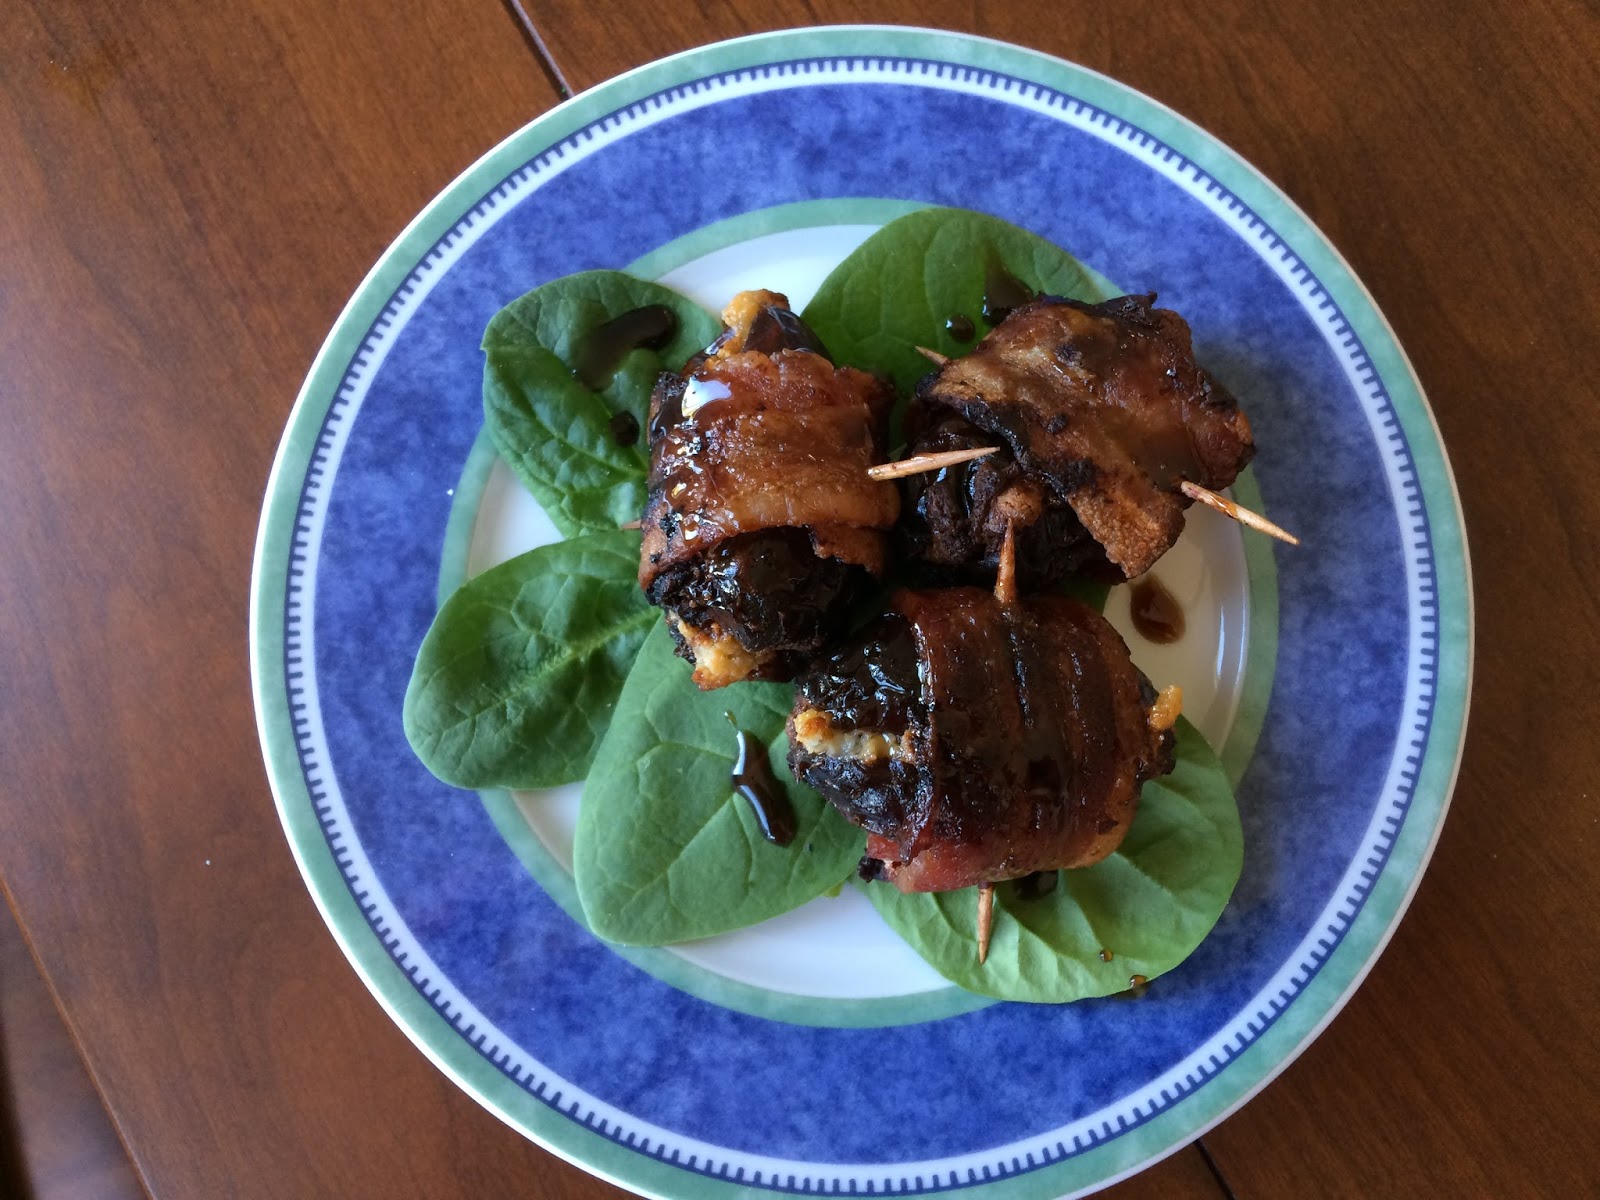
I made these bacon-wrapped dates today. Though delicious, they didn’t taste exactly as I wanted them to. Part of me is determined to continue my attempts until I get the recipe just right, but this would essentially mean resolving to eat more bacon, which may or may not conflict with some of my other goals for the new year.


In short, use the recipe below as a jumping off point, and feel free to tweak as you please. Here are a few things that I would do differently on a second attempt. 1) Greatly increase the blue cheese to cream cheese ratio. I would try 75%, or maybe even 100%, blue cheese. 2) Use smaller dates. While the medjools were meaty and delicious, they somewhat overwhelmed the cheesy filling. 3) Salt the filling, if needed. I think it would depend on how much cream cheese you opt to use.

Alterations aside, these were a deliciously salty, sweet, tangy snack. The bacon crisped up beautifully in the oven, while the exposed parts of the dates got deliciously caramelized. The balsamic drizzle was inspired by a similar dish I tried in Laguna Beach, and it adds a nice acidic counterpoint to all the richness.

And since I couldn’t offer you a perfect recipe myself…
If you’re in want of any resolutions for 2016, perhaps yours could be to try one of these delicious potato recipes:
     Hasselback Potatoes from this site, or
     Cheesy Potato Cups from over here
I eat potatoes fairly often, and I enjoy having a variety of stellar preparation methods up my sleeve. And frankly, these are stellar. So click click, eat eat.

Fun Fact:
Dates are a good source of fiber and potassium, a mineral with many vital functions. Potassium is necessary for muscle contraction and works with (or rather, against) sodium to regulate blood pressure and fluid balance in the body.


Bacon-Wrapped Stuffed Dates

Medjool Dates, scored lengthwise and pitted
Cream Cheese
Blue Cheese
Smoked Bacon
Toothpicks

2 Tablespoons Brown Sugar
1 Tablespoon Water
1 – 1½ teaspoons Balsamic Vinegar

Preheat oven to 375 degrees Fahrenheit. Mix equal parts cream cheese and blue cheese. Stuff 1 tsp of cheese mixture into pitted dates. Wrap ½ slice of bacon around date, and secure with toothpick. Bake on an ungreased baking sheet for 40 minutes, flipping each date halfway through, until bacon is browned and crispy. Let cool on (or over) a paper towel.

Boil the brown sugar, water, and Balsamic vinegar together until reduced and syrupy. Drizzle desired amount over the stuffed dates.

Thursday, December 24, 2015

Pear Butter


I generally have a hard time with summer ending. The fruit aisle at the grocery store transitions from stands bursting with cherries, berries, and peaches to a pathetic selection of approximately three fruits that are actually good in winter plus a bunch of pale, anemic fruits that are coaxed to survive through the dead of January. The plus side is that the few good winter fruits are very good and very versatile. Pears are one such fruit, and I think they are underappreciated. If you disagree, perhaps this pear butter can persuade you otherwise.


In case you’re new to fruit “butter,” it’s simply fruit that has been cooked and pureed to a thick spread and sweetened. It often has spices added. I like it because it’s more full-bodied and less overwhelmingly sweet than jams and jellies. Also, it’s really easy to make (no pectin required). For this recipe, you pretty much just chop pears into a crockpot, stir it now and then, and then add sugar and a few spices.

This pear butter has just the right amount of sweet and spice. It makes a great addition to morning toast and is fancy enough to give as a gift. If you can bear to part with it, that is.

Fun Fact: Fruits in general are a good source of vitamin A, vitamin C, potassium, and fiber. Potassium is a mineral with many vital functions in the human body, including nerve transmission and muscle contraction. Minerals can be lost in cooking water, but they are not destroyed by heat.


Pear Butter
Adapted from Food in Jars by Marisa McClellan
5 cups chopped pears, cored but unpeeled (I used Bosc pears and was very happy with the result, but the recipe doesn’t specify a variety)
1 teaspoon cinnamon
½ teaspoon ground ginger
¼ teaspoon ground nutmeg
1/8 teaspoon ground cardamom
juice of ½ lemon
1 cup sugar, can add more to taste

Place the chopped pears in a crockpot, and cook on low, covered, for 1 hour.

Stir the pears, and prop the lid slightly open by a wooden spoon or other utensil. Continue to cook for about 5-7 hours, stirring the pears every hour. After 4 hours, mash and or blend the pears to the desired consistency. Stir in the spices.

During the last hour of cooking, add lemon juice and sugar to taste. Continue to cook until the mixture is thick and spreadable, and then store in a jar in the refrigerator. Enjoy on toast, fruit, yogurt, etc. Makes about 2½ - 3 cups, depending on how thick you make it.