Showing posts with label Main Dish. Show all posts

Wednesday, August 31, 2016

Marinara Sauce & A Spanakopita-Inspired Pizza

More often than not, when I go to make a recipe that I’m excited to share on this site, I end up leaving out a major ingredient or burning something or taking pictures that I think are good at the time but then look like a Pinterest fail to me later. For example, I was going to finally post the hummus recipe that I’ve been in love with for several months, but I must have been distracted when I made it last weekend because I left out one of the liquid ingredients, and the end result, while tasting delicious, looked a bit more like wood putty than something you’d want to spread on crackers.

Fortunately, my failed plans tend to be counterbalanced by unexpected successes that keep my enthusiasm alive. Case in point: spanakopita-inspired pizza.


It would probably suffice to post that picture and shut up about the rest, but I just want to say a few more things before I describe how to make it:

1) This is my own marinara sauce, and I am quite happy with it. In addition to making a good pizza sauce, it’s also really good with cheesy stuffed pasta shells, on chicken Parmesan, and on anything else you like marinara sauce with. It has a rich, tomato-y flavor balanced with a good blend of herbs and spices. I hope you like it as much as I do.


2) This is the very best pizza crust recipe I’ve ever tried. It’s also the easiest. You can find it on this site and on this site and over here and….I could keep going. Lots of people have talked about it because it really is some dynamite pizza crust: it has a complex flavor and strikes a great balance between crispy and chewy. It gets even better with age too. I’ve put leftover dough in the fridge for 2-3 days before using it, and the flavor only improves.


3) Fun Fact (of course): Tomatoes contain lycopene, a type of carotene that may have antioxidant effects in the body. It has been researched in relation to cancer prevention, but results have thus far failed to show a direct correlation between increased lycopene intake and decreased cancer risk. So in other words, lycopene will not solve all your problems. However, this marinara sauce is delicious, so you should eat it anyway! And interestingly, lycopene in canned tomatoes is actually more bioavailable than the lycopene in fresh raw tomatoes.


Pizza Dough
(adapted from Jim Lahey’s brilliant recipe via smittenkitchen.com)

3 cups flour (up to half of it can be whole wheat if you want!)
1/8 teaspoon yeast
1 teaspoon + scant ½ teaspoon salt
1 cup water, plus extra as needed

The night before you want pizza*, stir together the flour, yeast, and salt in a large mixing bowl. Add water, and stir until the dough comes together in a craggy, ugly, approximate ball. If the dough feels too dry, add more water slowly. (The original recipe calls for 1¼ cups water, but I always have to add way more flour the next day when I use this much. However, extra pizza dough is never bad….) Cover the bowl with plastic wrap, and let proof overnight until it doubles in size. About 20-24 hours of rest time is good – it’s not really fussy.

When you’re ready to use the dough, deflate it, and knead on a lightly floured board a couple times just to work out the air bubbles. Separate into whatever size and quantity of dough balls you want. (This recipe makes about 3 10-inch pizzas.) Then, roll/stretch/toss each dough portion into a thin layer.

*I should say the night before you intend to eat pizza. Wanting pizza is kind of a constant for me.


Marinara Sauce
(My own recipe!!)

2 tablespoons olive oil
½ medium onion, finely chopped
2-3 tablespoons minced peeled carrot
2 cloves of garlic, minced
1 28-oz. can crushed tomatoes*
2 teaspoons dried basil leaves, crumbled
½-¾ teaspoon dried oregano leaves, crumbled
½ teaspoon salt
¼ teaspoon nutmeg
¼ teaspoon freshly ground black pepper
½ cup water

Heat olive oil in a large sauté pan over medium heat.  Add onions and carrot, and cook, stirring occasionally, until softened, about 5-10 minutes.  Stir in garlic, and cook for a minute or two more.  Add remaining ingredients, bring to a simmer, and reduce heat to low.  Let simmer, stirring occasionally, until sauce has reached desired consistency (about 50 minutes). 

*Pizza Sauce Variation: Use tomato puree instead of crushed tomatoes and add ¼ teaspoon red pepper flakes. (Tomato puree is NOT the same as tomato paste. If you can’t find canned tomato puree, then just blend the marinara sauce a bit or else deal with it’s textured goodness.)


Spanakopita-Inspired Pizza

(These measurements are approximate, as everyone likes different quantities of toppings on their pizza)

3-4 cloves garlic, minced
½ tbsp. olive oil

1/3 of preceding pizza dough recipe
approx. ¼ cup marinara sauce (enough for a very thin layer over the whole crust; you don’t want any globs)
approx. 1½ cups shredded cheese – I really like 4 parts mozzarella to 1 part Parmesan
1 to 1½ cup chopped fresh spinach
1 green onion, sliced thin
1 oz. feta cheese

Preheat your oven to 500 degrees Fahrenheit, or if it doesn’t get that hot, just use the maximum heat setting. If you have a pizza stone, let the stone preheat in the oven as well.

Heat the olive oil in a small saucepan over medium heat. Add the garlic, and stir constantly until golden brown. Scrape garlic into a separate dish to cool.

Gently stretch the pizza dough into a thin, round layer over a square of parchment paper. Spread the marinara sauce over the pizza dough, almost to the edges. Top the sauce with about 2/3 of the shredded cheese, and then sprinkle the sautéed garlic evenly over that. Next, spread the spinach and green onion followed by the rest of the shredded cheese. Finish it off by crumbling the feta cheese over the top.

When the oven is preheated, gently slide your parchment paper onto the pizza stone or place a pan with the parchment and pizza atop in the oven. Let bake for about 10-15 minutes, or until the crust is golden, and the cheese is beginning to blister in spots. The exact length of time will vary depending on your oven, how thin the dough is, what pan you’re using, etc. So keep an eye on it. 

Monday, April 4, 2016

Garlicky Cashew Chicken


After a long dearth of poultry-related posts on this site, I have now given you two chicken recipes in a row. Forgive my poorly synchronized variety, but I couldn’t contain my enthusiasm any longer. I first tried this recipe back in December, and it has been haunting me since.

I love the unique flavor profile of this dish: it has a sweet, salty, spicy, umami combination of flavors with ingredients that smack of both East Asian and South American cuisines. I can never decide whether I would rather have this with rice or as an exotic taco filling, and I end up eating the whole batch before I reach a conclusion.

The good stuff that goes in the food processor
The original recipe calls for thighs or drumsticks and suggests either grilling or broiling. For one reason or another, the thought of dark meat with the cashew coating didn’t appeal to me, so I used chicken tenders the first time, and I have never looked back. As I do not own a grill, broiling was the only way to go, and I am more than satisfied with that decision as well. The chicken tenders cook super fast in the broiler, and they get perfectly done in the time it takes the topping to brown. The final result is a crispy, browned coating on juicy, tender chicken. And given that this recipe is also quick and easy to prepare, I give it my wholehearted endorsement in every regard.  Go eat this now!

Fun Fact: Cashews are a good source of magnesium, a mineral that is essential to the function of more than 300 enzymes in the body. Magnesium is also involved in bone formation, muscle and nerve function, and blood pressure regulation.


Garlicky Cashew Chicken

Adapted from Melissa Clark’s In the Kitchen with a Good Appetite

1 cup roasted cashews, salted or unsalted, with additional cashews for garnish
2 tablespoons chopped cilantro, plus more for garnish
¼ cup olive oil
4 large cloves garlic, peeled and roughly chopped
2 tablespoons soy sauce
2 teaspoons brown sugar*
2 limes – 1 for juice, 1 cut into wedges for garnish
1 or 2 jalapeños, using as many or as few seeds as desired
2 tablespoons water
Salt and pepper to taste
1½ lbs. chicken tenders

Combine the cashews, 2 tablespoons cilantro, olive oil, garlic, soy sauce, brown sugar, lime juice, jalapeño, and water in a food processor or mini food processor (I’m confident a blender would work here too, though it may require more pausing to scrape down the sides), and grind together until smooth. Add salt to taste.

Preheat the broiler. Line a baking sheet with foil, and spray or coat lightly with oil. Season the chicken tenders with salt and pepper, and arrange bottom-side-up on the oiled baking sheet. Drop a generous spoonful of the cashew sauce over each tender, and use a separate utensil to spread over the surface of the chicken (DO NOT TOUCH THE SAUCE SPOON TO THE CHICKEN – IF YOU HAVE EXTRA SAUCE, YOU WANT IT TO BE SANITARY FOR CONSUMPTION).


Broil chicken for 5 minutes, then flip each tender and repeat the sauce spreading process on the smooth top sides. Broil for about 5 more minutes, or until the coating is golden brown, and the chicken’s internal temperature is 165 degrees F.

Sprinkle additional chopped cashews and chopped cilantro over the top, and serve with lime wedges and extra sauce, if any.

This chicken is delicious on its own and would also make a great lettuce wrap filling. Leftover sauce would be delicious on rice or as a sandwich spread (I’m thinking a BLT…mmmm….)


*I accidentally misread this as 2 tablespoons the last time I made this. It was still delicious, and it made the sauce brown up nicely. It certainly doesn’t need this much sugar, though.

Monday, February 29, 2016

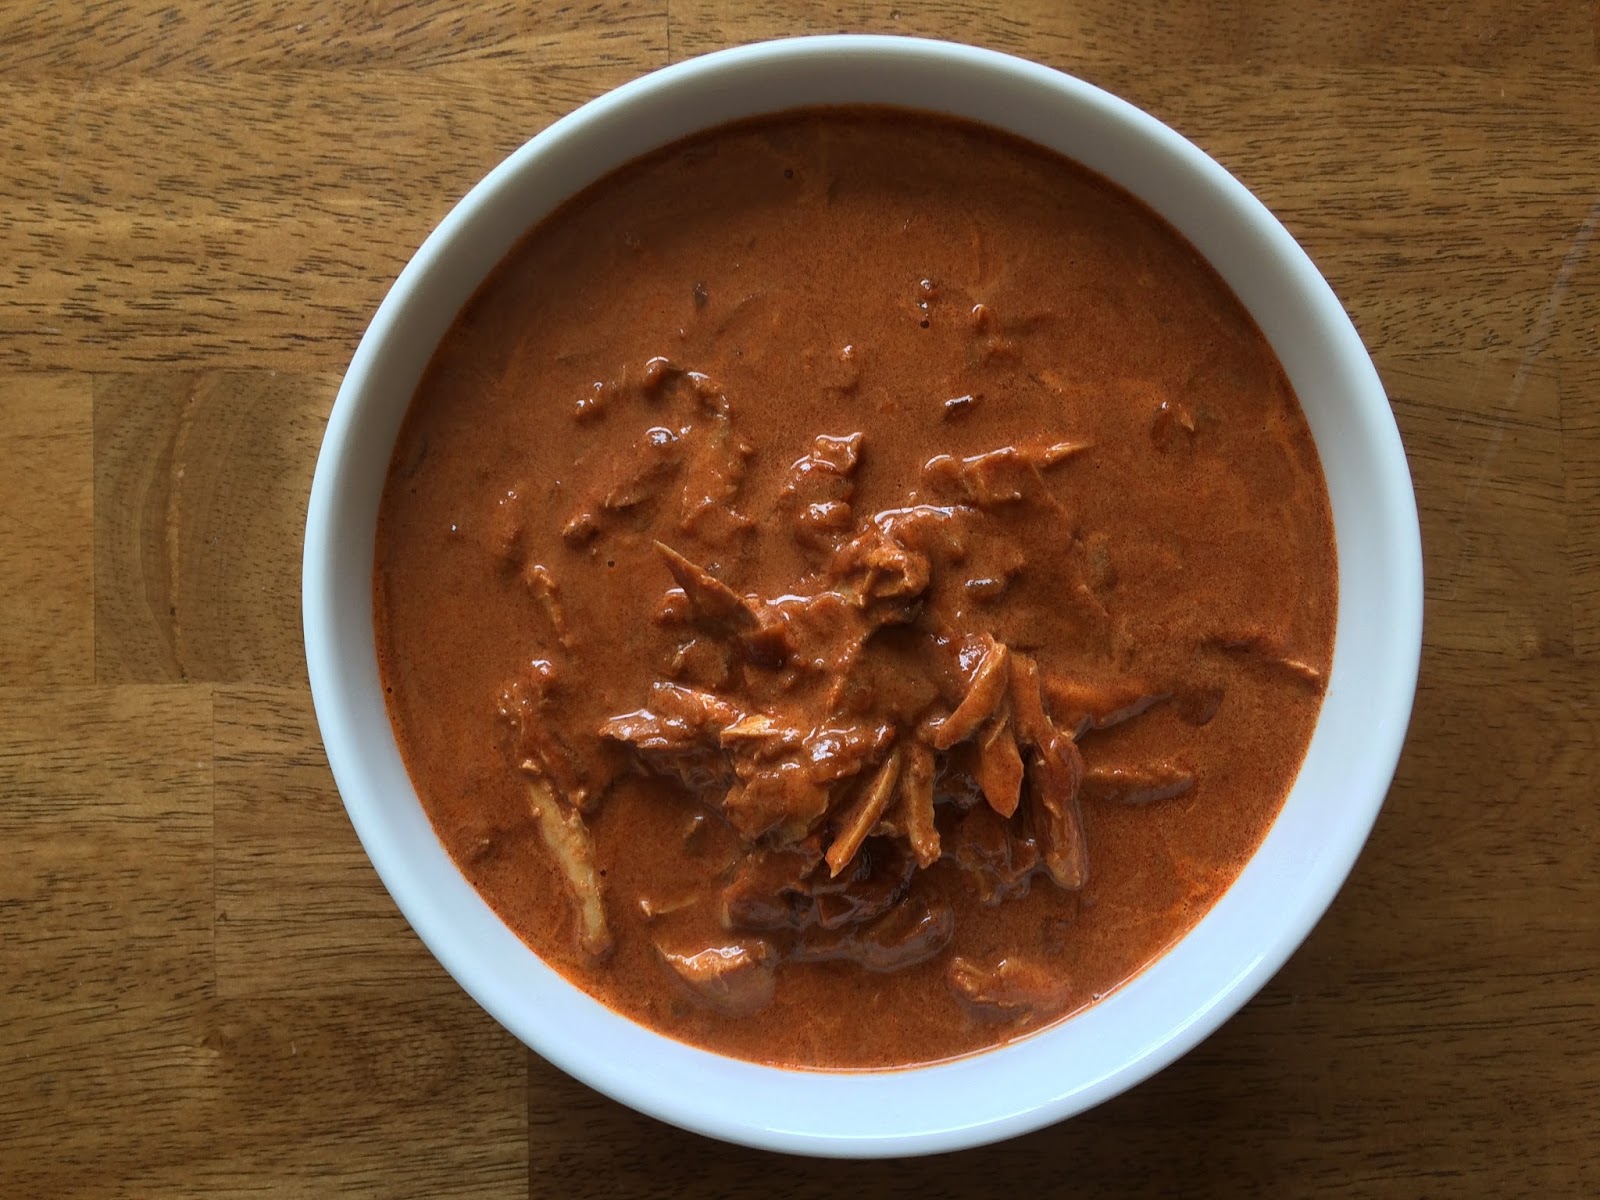
Chicken Paprikash


I’m still not sure how to pronounce it, but I sure know how to eat it! This dish comprises everything I love in a good chicken recipe: delicious, easy, interesting, and not soaked in a half gallon of oil. (I know that last attribute is really setting the bar high.)


I’ve had this recipe bookmarked for close to half a year and finally got around to trying it last week. I then proceeded to make it again…and again…all in the same week. In my defense, I shared a lot of the goods, but the fact that I made this recipe 3 times in 7 days underscores how good it is.

I can summarize the recipe thusly: sauté onion, add paprika, add chicken and water, simmer for 1 hour, shred chicken, add sour cream and flour, season with salt and pepper. It’s really that easy, yet the flavor is rich and complex. The paprika, onion, chicken, and sour cream combine into a savory, creamy, warmly spiced (but not spicy) sauce; and the chicken is super tender from the long braise. It goes perfectly over a bowl of rice with a good book and a fuzzy blanket.


A couple notes on ingredients:
Chicken – the original recipe calls for bone-in thighs or chicken breasts, quartered. I have only tried this recipe with dark meat, as all my local grocers seem to be anti-bone-in chicken breasts. I imagine you could also try boneless, though. I have tried both thighs and drumsticks, and both tasted great. However, it was a pain in the derriere to get the skin off the drumsticks, and the sauce ended up way fattier than when I used thighs.
Paprika – you don’t need to use the fancy stuff, but it should be fresh. The original recipe asserts the more paprika the better. I agree and would add that you don’t want to be using old, pale, sad paprika. Feel free to buy the cheap-o brand, though. As long as it’s fresh, the end result will be really good.

Fun Fact: The dark parts of poultry are dark due to more myoglobin, which is an iron-containing protein in muscle. Ergo, the dark meat contains more iron than the light meat. This is a boon for iron-deficient, budget-conscious shoppers such as myself. If you want to maximize your iron absorption, eat it separately from calcium-rich foods because calcium and iron compete with each other.


Chicken Paprikash
From Food52.com

2 tablespoons vegetable oil
1 large onion, diced
4 heaping tablespoons paprika
4 bone-in chicken thighs, with skin and excess fat trimmed away (or 2 chicken breasts or 5 drumsticks)
1¼ teaspoons salt
½ cup sour cream
1 spoonful (approximately 1 tablespoon) all-purpose flour
Salt and pepper to taste

Heat the oil in a medium-large pot over medium heat, and sauté the onions until soft. Add the paprika, and continue to sauté, stirring very frequently, for a couple of minutes. Add the chicken to the pot, and sprinkle salt over. Stir everything together until the chicken is coated in the paprika.

Here is where I diverge from the recipe slightly: the original states to let the chicken brown slightly, but I forgot to do this the first time, and it still turned out great. Due to laziness, the most I have done is get the chicken slightly de-pinked. So, do what you want. Follow your instincts. Browning probably concentrates and enriches the flavors a bit.

Add 2 cups water, and bring to a boil. Turn down the heat, and simmer partially covered – I like to prop the lid with a wooden spoon – for 45-60 minutes until the chicken is cooked through (165 degrees Fahrenheit). Remove the chicken to shred it, and discard the bones. Whisk the sour cream and flour together, and stir into the paprikash broth. If the sauce is thinner than you want it, then boil it down to the desired consistency while the chicken is removed. Add the chicken back to the pot, and heat through. Serve over rice or with dumplings. Or both!

Thursday, August 6, 2015

Creamy Pesto Pasta


One day, I made cilantro pesto as I am wont to do when I have extra cilantro and Parmesan cheese on hand.  Then I realized that I also had leftover cream cheese.  And there was much rejoicing.


This pasta concoction turned out to be one of my happy let’s-throw-several-yummy-things-together-and-see-what-happens success stories.  The first time I made it, I used spaghetti noodles, and the second time, I used whole wheat rotini.  I enjoyed it thoroughly both times, so you can really use any pasta that suits your fancy.  The flavors are bold enough that they stand up well to whole wheat, though, and I appreciate the wholesome heartiness.

I’m not a huge pasta person in general, but I do consider pasta an excellent vehicle for pesto.  The cream cheese lends a nice texture, but there’s not so much of it that the dish becomes heavy.  I really enjoy the slight sweetness of the broiled zucchini, and the almonds add a nice crunch.  Also, this pasta is fantastic warm or cold, which makes it an ideal leftover kind of food.  The herbs and nuts you choose to use in the pesto are variable too.  This would be fantastic with traditional basil pesto or a parsley-walnut pesto.  Go crazy.


Fun Fact: Garlic contains a phytonutrient called allium, which may contribute cholesterol-lowering benefits (evidence is still limited).  However, garlic extracts and pills may not contain the same substances that would cause this effect, so embrace the garlic breath and eat some pesto.


Creamy Pesto Pasta
Pesto
1/3 cup raw almonds
1 oz. parmesan cheese
2 cloves garlic
¼ teaspoon salt, plus more to taste
1 cup packed cilantro
4-6 Tablespoons olive oil

Toast the almonds in a dry skillet over medium heat, tossing often, until golden and fragrant.  Let cool.  Cube the Parmesan cheese.  In a small food processor, pulse/grind the Parmesan until finely ground.  Remove from machine, and set aside.  Add the almonds to the food processor, and pulse until well chopped but still chunky (don’t turn them all into dust).  Remove almonds from bowl and add to Parmesan cheese.  Place the garlic and the salt in the food processor, and process until finely minced.  Add the cilantro and 3 tablespoons of the olive oil, and process again until finely minced.  Place the almonds and cheese back into the food processor with the herbs, and continue to pulse while drizzling the remaining olive oil into the pesto.  Add oil, and pulse until it achieves the consistency you want.  I prefer mine not too oily with the almonds still a bit chunky.

Pasta
8 oz. whole wheat rotini
1-2 small zucchini, halved and sliced into ¼-inch thick slices
Olive oil
3 oz. cream cheese, softened
10 Tablespoons pesto (about one full batch)
Salt and Pepper to taste
Additional cilantro, toasted and chopped almonds, and shaved Parmesan to garnish

Bring a pot of well-salted water to boil, and add the pasta.  Boil about 10 minutes, until soft but not mushy.  Reserve ½ cup of the pasta water, and drain the rest.

In the meantime, line a baking sheet with foil, and spread the zucchini out in one layer.  Drizzle with a little bit of olive oil (1-1½ tsp.), and sprinkle with salt and pepper to taste.  Broil for about 5-10 minutes until the zucchini is tender and browned in spots.


Add the cream cheese and pesto to the still hot pasta, and stir to combine, adding pasta water 1 tablespoon at a time until the desired consistency is reached.  Season with salt and pepper to taste.  Add the broiled zucchini (as much or as little as you want), and toss.  Serve with additional cilantro, toasted almonds, and shaved Parmesan cheese.   This dish is good warm or cold.  Serves four generously.

Monday, May 25, 2015

My Friend, Peanut Butter


Peanut butter is a friend that I once took for granted.  It has always been there for me, but not until recently did I show it the appreciation it deserves.  If you, too, have been neglectful toward this noble condiment, simply using it as a last resort, I-only-have-thirty-seconds-to-make-lunch ingredient, I hope these two recipes will inspire you to spend a little more quality time with this valiant kitchen staple.

My roommate works at a smoothie place with the initials JJ. She once described a peanut butter chocolate banana smoothie that sounded so good, I tried it at home the next day. I still haven’t tasted the “JJ” version, but I’m too happy with this version to care.  This smoothie is thick like a chocolate shake, but it has enough redeeming ingredients in it to call it breakfast.

Picture of actual smoothie is forthcoming.  I was struggling to make a picture of brown sludge (albeit delicious brown sludge) look attractive.

This peanut sauce is good on everything: chicken, raw vegetables, noodles, fingers...  It’s peanut-y, pleasantly spicy (if you want it to be), and perfect.  I highly recommend it.


Fun Fact: Bananas are a climacteric fruit, which means they continue to ripen after picking.  As bananas ripen, one of the changes that occur is that the starches break down into sugars.  When stored in a chilled environment, however, the conversion of starch into sugar can be halted.  In other words, once the bananas reach your preferred level of ripeness, you can throw the whole bunch into the fridge.  They will change color on the outside but still be great on the inside.  On the other hand, if you want to make something sweeter like banana bread (or the chocolate smoothie below), then letting those starches disintegrate is great! And you were expecting something about peanut butter, weren’t you? 


Chocolate Peanut Butter Banana Smoothie

1/3 cup milk
1 large, very ripe banana, sliced and frozen
1 tablespoon sugar
1 tablespoon cocoa powder (Dutch process or not Dutch process)
1 generous tablespoon peanut butter (natural or unnatural)

Blend all ingredients together until smooth.  (If using an immersion blender, it’s best to blend the banana a few slices at a time in the milk, scraping the bottom with a spoon between blends.)


Thai Peanut Sauce
Adapted from notderbypie.com, in turn adapted from In the Small Kitchen

1 tablespoon fresh ginger, grated
2 gloves garlic, minced
1½ - 2 tablespoons sugar (use less if not using natural peanut butter)
2-3 teaspoons chili paste (sambal oelek or sriracha; both are excellent)
½ cup peanut butter
2-3 tablespoons soy sauce (start with less and add to taste)
2 tablespoons Worcestershire sauce
2 tablespoons rice vinegar or apple cider vinegar
2 tablespoons toasted sesame oil
¼ cup water


Blend all ingredients together until smooth.  This can be done with a blender or food processor, if desired.  Add additional sesame oil, soy sauce, and chili paste to taste.  Keep refrigerated.

The lettuce wraps pictured above contain the following:
tofu (see two of my favorite recipes here and here)
julienned carrots
julienned red bell pepper
sliced water chestnuts 
ramen noodles tossed with sesame oil and soy sauce 
seeded and sliced cucumbers (sprinkled with a tiny bit of salt and sugar to draw out water and concentrate the flavor) 
cilantro
limes
peanut sauce
extra sriracha

Other great lettuce wrap fillings include:
grilled chicken
bean sprouts
toasted sesame seeds
mushrooms
other noodles (udon, rice, etc.)